
Here are a few ways to enhance Photoshop performance:
- Optimize your current hardware
- Customize Performance Preferences in Photoshop
- Tailor your Photoshop work habits (read more: History, Caches & Performance-Friendly Work Habits)
Hardware
The faster the processor you’re using and the more random access memory (RAM) you have installed on your computer, the faster and smoother Photoshop will run.
If upgrading your computer is not an option, read on to find out how you can help Photoshop run more efficiently.
Performance Preferences
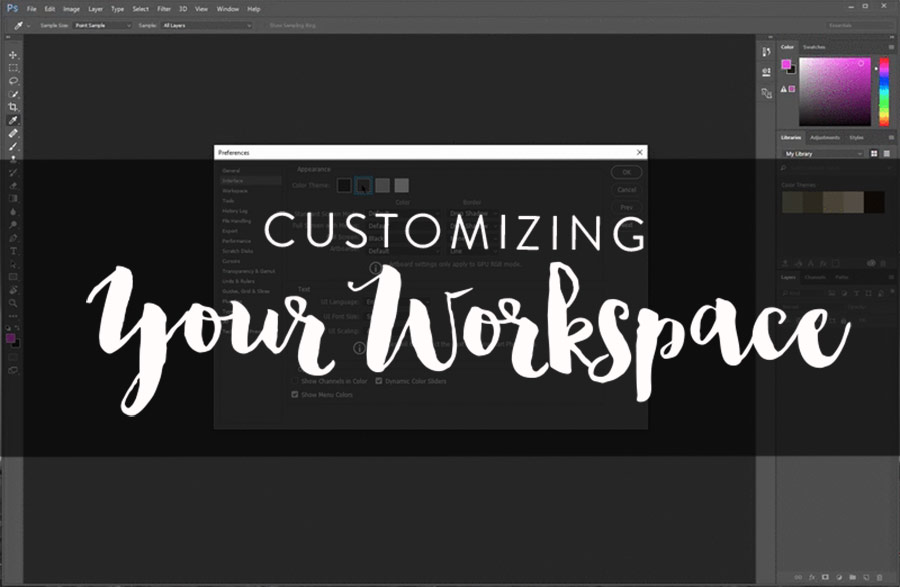
When updating your Photoshop or computer, adjusting your Photoshop Performance Preferences should be your first priority. Here are two important settings you should consider adjusting:
Efficient Use of Memory
Photoshop really likes RAM and will use as much spare memory as the settings will allow. The 32-bit Photoshop version on both Windows and Mac are subject to certain limitations in the amount of RAM that the system will allow the program to utilize (roughly 1.7-3.2GB depending on the OS and PS version). Conversely, the 64-bit versions will take as much RAM as you can give.
The best way to keep it under control is to optimize the Memory Usage settings via Edit > Preferences > Performance on Windows and Photoshop > Preferences > Performance on Apple computers.
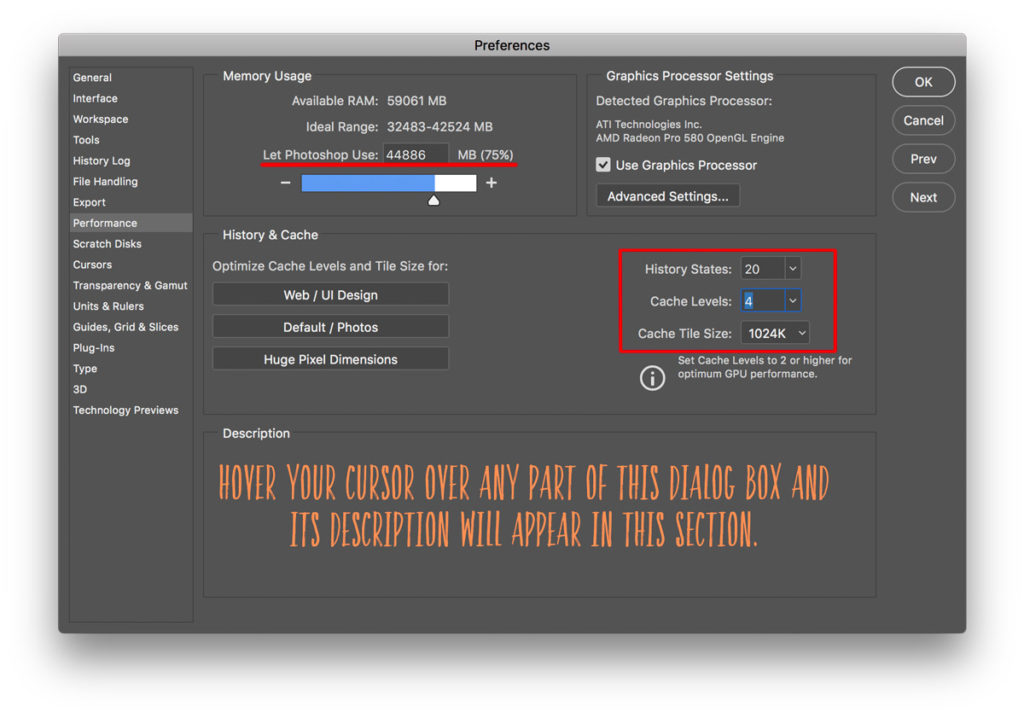
>Recommended settings for Memory Usage
- PC – 50-55% of the total available RAM
- Mac – 70-75% of the total available RAM
- Keep the number of History States as low as possible (20 is the default number of steps). Learn to use non-destructive and reversible methods, so you don’t have to rely on History States. Read more about History Panel settings: Photoshop Basics: Getting To Know The History Panel.
- Keep Cache Levels at their default number 6. Increasing Cache Levels will increase the rendering speed, which is particularly effective with working with “heavy” high-resolution images. Try working at the default state and increase the number when necessary only. Read more about Caches: History, Caches & Performance-Friendly Work Habits.
- Use Purge command when necessary: Edit > Purge > ( option ). It will eliminate the extra image data that is consuming your RAM. Keep in mind that clearing History when Purging will delete all your current history states and you will not be able to undo your latest actions.
Photoshop CC does not have increased memory usage over Photoshop CS6. Its memory behavior is identical to Photoshop CS6 (and CS5, CS4, etc.). If Photoshop is taking more than 20 seconds to load something is wrong with your system. Normal launch is under 7 seconds, and with an SSD it’s under 2 seconds.
If the Memory Usage is set higher, the Operating System (OS) of your computer will start competing with Photoshop for the remainder of the RAM. The result will slow down the entire computer – not good. Photoshop may be happy, but your computer may crash or freeze. It does little use to run Photoshop at a faster speed if everything else slows to a snail’s pace and you loose work to a system crash.
Once your Memory Usage limit is set, check the efficiency status in either the Info Panel Efficiency readout, or in the bottom left corner of any of your open PSD files.
If the value is below 100%, it indicates that if you allocate more RAM to Photoshop, the operations will perform faster. You can close other applications running in the background as well as images that you are not working on to increase efficiency.
Photoshop allocates memory up to the limit you set in Memory Usage Preferences, then reuses that memory. It won’t release the memory until the OS needs it, or you exit Photoshop.
If you are experiencing any troubles with your Photoshop CC performance it is possible that the issue is due to external factors such as corrupt fonts, third party plugins or utilities. Try cleaning up or re-installing your plugins, utilities and fonts, some of them may be significantly slowing your PS.
Purge command for Mac users
Mac OS X has fairly good memory management but it’s not perfect, and sometimes RAM can be held unnecessarily in the “inactive” state despite the contents no longer being used. If you need to free up some RAM to speed up your computer performance you can force Mac OS X to clear out inactive memory.
- Launch Terminal, found in Applications/Utilities and enter the command purge
- Give your Mac a minute or two to complete the process
Purging History and Undo make more RAM available immediately. However, those unused history states are automatically moved from RAM to scratch disk anyway as you work. So purging History and Undo are only useful in limited circumstances.
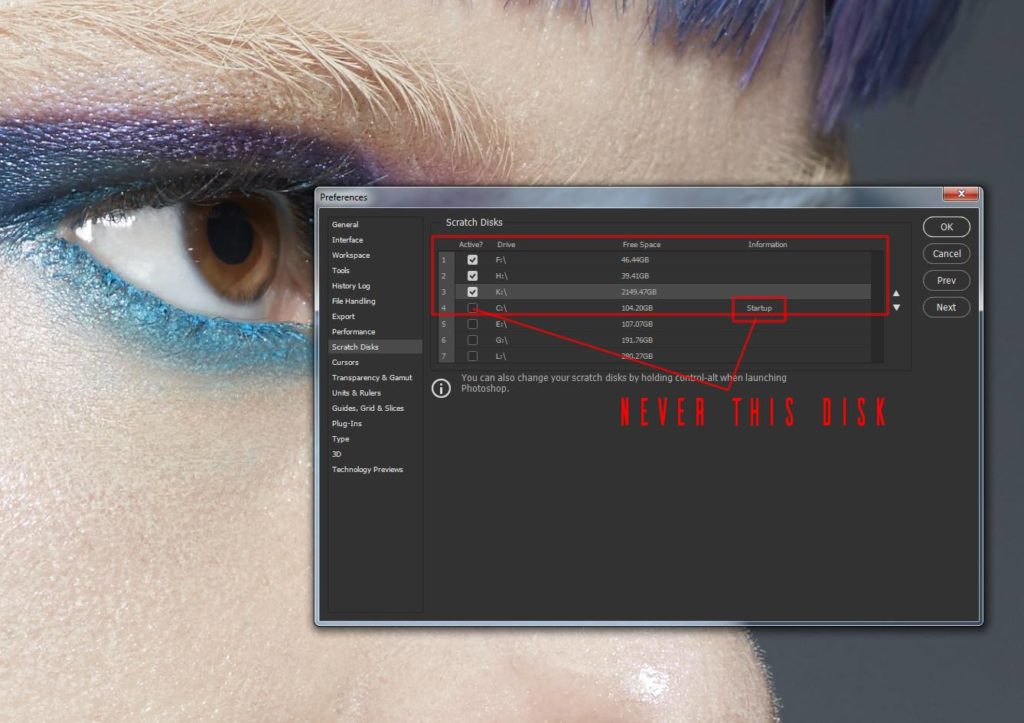
Scratch Disks
Hard drive space on your computer is used by Photoshop as temporary “swap” space, or virtual memory. When your system does not have enough RAM to perform an operation, this “virtual memory” is accessed. The Photoshop scratch disk is your internal hard drive and/or any plugged in external hard drives. Scratch disks work as the secondary memory resource.
Having a lot of free space on Scratch Disks for Photoshop to utilize helps, but accessing information in RAM is still much faster than accessing information on a Scratch Disk. Therefore, Photoshop is fastest when it can process all or most image information in RAM.
A few valuable notes from Australian retoucher Gary Alan:
Going a step further in gaining max efficiency in Photoshop, a lot is hinged on the configuration of the disks to avoid performance bottlenecks.
Without saying the more RAM the better but additionally one wants 4 drives, preferably all SSD.
#1 – A dedicated drive that PS is installed on, separate from your C: or the drive the OS starts from, 256 gig should be enough. Also keep Lightroom, Capture One ect. on this drive;
#2 – A working drive where you save and open your PS documents while you are working on them, 128 gig should be enough
#3 – A dedicated scratch disk that is kept absolutely clean, 64 gig should be enough. This should be the primary scratch disk. Can fill up if large amount of documents are open at once, getting a 128 or 256 gig will help.
#4 – A storage drive to archive completed jobs, for which a standard HDD is good enough.Configure your scratch disks so that the disk the OS and PS are installed on are not at the top, the Dedicated scratch disk should be first, then the working drive then the storage, like in the screenshot below:
Click to enlarge. Screenshot by Gary Alan.
ADDITIONAL READING:
- Adobe Forum: Photoshop CC -> performance down, memory usage up.
- Smashing Magazine: 10 Simple Steps to Better Photoshop Performance


I DON’T UNDERSTAND THAT MY PC HAS AN I7 processor with 16 16gb of ram but the performance panel is only allowing 3.2 0f ram.
Any advice appreciated.
What PS version are you using?
That’s because you’re running in 32 bit. You need to be running the 64 bit version of PS to take advantage of more RAM.
Chris,
Try to read the post, you will see that 32 bit version has limit on RAM and 64 bit version has not!
Thank you, I really needed this.
Thanks for the post…
Hi,
can anyone please explain why its better to have PS / LR installed on a differetnt drive (other than the startup). And also does it need to be an additional physical ssd/hdd or is a logical disk partition enough?
thx
Thomas
Hi Thomas, our IT specialist Tam says: “Taking out all the “disk access” away. It also needs to be a separate physical disk and not logical, otherwise you’re just partitioning your drive out and not really saving any disk access.”
Hope this helps!